Parameters for Drying Water‑Based Inks on a Flexo Label Printing Machine
You’ve just finished a long run of labels on your flexo press. The colors are vibrant, the registration is tight, and the customer is happy — until you touch the finished roll. The ink smudges. The labels stick together. The entire run goes to rework or scrap.
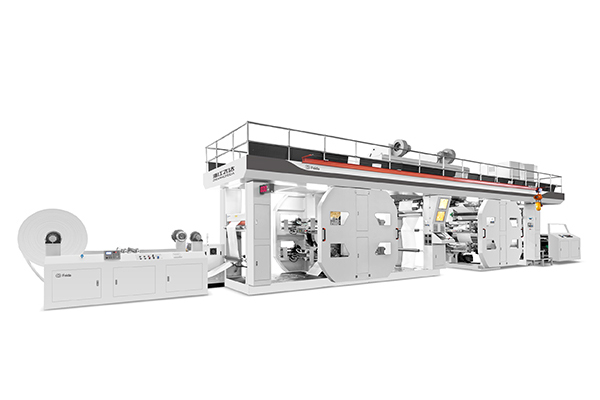
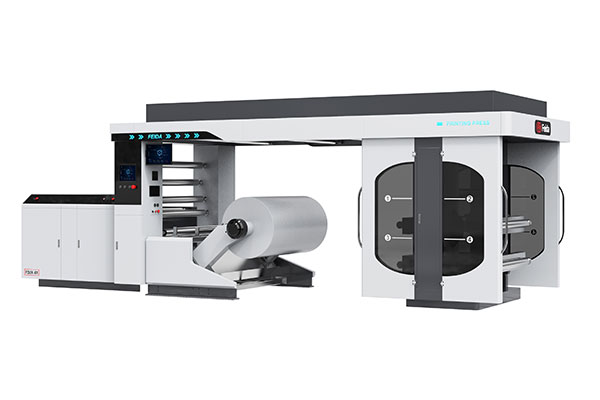
Water‑based inks are the environmentally responsible choice, but they come with a drying challenge that oil‑based inks don’t. The water must evaporate completely before the substrate is rewound, and that takes heat, airflow, and time. On a flexo printing machine like Feida’s CI flexo press, which reaches speeds up to 200 m/min with 1‑10 color configurations, drying is often the bottleneck that limits throughput [0†L8-L10][0†L8-L10]. This guide walks through the three pillars of water‑based ink drying, zone‑by‑zone drying profiles, the impact of ink film weight, and a practical daily check routine.
The three pillars of water‑based ink drying
Drying water‑based inks isn’t just about turning up the heat. Three factors work together — and each must be balanced against the others.
Temperature — the evaporation driver
Heat accelerates water evaporation. For most water‑based flexo inks, the ideal drying temperature ranges from 50°C to 90°C, depending on the ink formulation and substrate. However, temperature must be kept below the substrate’s distortion point. Films like BOPP or PET can warp above 70°C; paper and cardboard can tolerate higher temperatures but may curl. The rule: as hot as possible without damaging the substrate.
Airflow — the humidity remover
Airflow is often more important than temperature. Without sufficient airflow to carry away evaporated water, a saturated vapor layer forms just above the ink film, slowing further evaporation. Think of it like drying clothes on a line — a breeze dries them faster than still air, even at the same temperature. High-velocity hot air knives directed at the ink surface break through this vapor layer and dramatically accelerate drying.
Time (line speed) — the dependent variable
Time in the drying tunnel is determined by line speed. A machine running at 200 m/min gives the ink much less drying time than one running at 50 m/min. The relationship is linear — halve the speed, double the drying time. When adjusting drying parameters, line speed is the variable that affects everything else. If you can’t increase temperature or airflow, you must slow down.
Setting your drying tunnel profiles — by zone
Most flexo drying tunnels have three distinct zones. Setting each zone correctly is the key to efficient drying without damaging the substrate.
Zone 1 (Entry) — preheat and evaporate
Temperature: 50–55°C. Airflow: Moderate.
The ink enters the tunnel with most of its water content still present. The entry zone should be warm enough to start evaporation but not so hot that the ink skins over. Skinning traps water underneath, causing blistering later. Preheat also brings the substrate up to temperature gradually, reducing thermal shock.
Zone 2 (Middle) — rapid drying
Temperature: 80–90°C. Airflow: Maximum.
This is where most of the water is removed. The middle zone should be the hottest section of the tunnel, with maximum airflow from hot air knives. The high‑velocity air breaks the boundary layer above the ink, allowing rapid evaporation. This zone does the heavy lifting — if drying issues appear, this is where adjustments matter most.
Zone 3 (Exit) — equalize and cool
Temperature: 55–60°C. Airflow: Low.
As the substrate exits the drying tunnel, it should be cooled gradually to prevent thermal shock and curling. The exit zone also allows any residual moisture to equalize across the ink film. If the ink is still tacky at the exit, your Zone 2 settings are insufficient — either too cool, too little airflow, or too fast a line speed.
Below is a quick reference table for drying zone parameters:
| Zone | Temperature | Airflow | Purpose |
|---|---|---|---|
| Entry | 50–55°C | Moderate | Preheat, initial evaporation |
| Middle | 80–90°C | Maximum | Rapid drying, bulk water removal |
| Exit | 55–60°C | Low | Equalize, prevent curling |
The interaction between ink film weight and drying
Not all printed areas dry at the same rate. The thickness of the ink film has a direct impact on drying time.
Thin film (line work) — fast drying
Line work, text, and fine details deposit a thin layer of ink — typically 2–4 microns. These areas dry quickly and can tolerate higher line speeds. The water has less distance to travel to reach the surface, and evaporation happens rapidly. If you’re running a job with mostly fine text and line art, you can run at the higher end of your speed range.
Thick film (solids) — slower drying
Solid areas and heavy coverage deposit 6–12 microns or more. Water trapped in a thick film takes longer to escape, and the surface may dry before the underlying ink, creating a skin that traps moisture. This is a common cause of blistering and adhesion failure. For jobs with large solid areas, you must either reduce line speed, increase temperature (within substrate limits), or increase airflow.
Adjusting for mixed coverage
Most jobs contain both line work and solids. The drying parameters must be set for the heaviest coverage on the job, not the average. If you set the dryer for the line work, the solids won’t be fully dry. Always run a test at the beginning of the job — stop the press, pull a sample, and check for smudging and tack before committing to full speed.

Questions about water‑based ink drying
Q: Why does my water‑based ink feel tacky even after drying?
A: Tackiness after drying usually indicates one of three issues: insufficient drying temperature, inadequate airflow, or the presence of a plasticizer or additive that remains sticky at room temperature. First, verify your drying tunnel temperatures with a contact thermometer — the displayed temperature may not match the actual temperature at the ink surface. Second, check that your exhaust filters aren’t clogged; restricted airflow reduces drying efficiency. Third, confirm with your ink supplier that the ink formulation is appropriate for your substrate and drying conditions.
Q: Can I add an accelerator to speed up drying?
A: Yes, but with caution. Accelerators (often called “dryers” or “catalysts”) can speed up the crosslinking or evaporation of water‑based inks. However, they can also shorten pot life, affect color, and reduce adhesion. Always test accelerators with your specific ink and substrate combination before running a full job. Start with the manufacturer’s recommended dosage — typically 1–3% by weight — and increase only if needed.
Q: How do I know if my exhaust filter is clogged?
A: A clogged exhaust filter reduces airflow, which directly impacts drying efficiency. Signs include: drying tunnel temperatures that are difficult to maintain, increased tackiness in the finished print, and a noticeable reduction in air velocity at the hot air knives. Check the filter pressure gauge — if the pressure drop across the filter has increased by more than 20% from baseline, it’s time to clean or replace it. For daily checks, simply hold a piece of tissue paper near the exhaust vent; if there’s little to no suction, the filter is clogged.
Daily dryer check routine
Before you start the first job of the day, run through this five‑minute check. It catches problems before they cause scrap.
-
Temperature verification — Use a contact thermometer to check that the actual drying tunnel temperature matches the setpoint at each zone.
-
Airflow test — Hold a piece of lightweight paper near the hot air knife outlets. It should flutter vigorously. Weak airflow indicates clogged filters or a failing blower.
-
Exhaust pressure check — If your machine has a pressure gauge on the exhaust, note the reading and compare it to the baseline when the filters were clean.
-
Substrate compatibility — For new substrate rolls, run a small sample through the dryer at the planned speed and check for distortion, curling, or discoloration.
-
Ink viscosity check — Water‑based inks can thicken overnight. Measure viscosity and adjust with water or thinner before starting the run.
Feida Machinery’s CI flexo printing machines are built for high-speed production with advanced automation and control functions [0†L44-L48]. But even the best equipment needs the right drying parameters to deliver smudge‑free, fully cured labels. Before you start your next run, verify your zone temperatures, check your airflow, and adjust your speed for the heaviest coverage on the job. A few minutes of setup saves hours of rework.
Need help dialing in your water‑based ink drying parameters? Contact Feida Machinery for technical support or product consultation. Share your substrate type, ink formulation, and typical line speed — their team can recommend drying profiles for your specific application.