How to Set Up a Flexo Printing Machine for Paper Cup Substrates
You’ve dialed in your press for glossy labels and flexible film. Then comes a roll of PE-coated cup board — and suddenly the ink beads up, the drying stalls, and the register drifts. Setting up a Flexo Printing Machine for paper cup substrates requires a different approach. The polyethylene layer that keeps hot coffee from leaking also repels water-based ink. Too much impression pressure crushes the board’s fibers. Too little and ink transfers unevenly. This guide walks through corona treatment, anilox selection, impression pressure, web tension, and drying adjustments — so you can move from frustrating trial runs to reliable production quality.
The PE Layer Changes Everything — Here’s How
The substrate you’re printing on isn’t really paper. It’s paperboard coated with a thin layer of polyethylene (PE) — typically 12–25 gsm. The PE gives the cup its liquid barrier, but it’s low-energy, non-porous, and chemically inert. Water-based inks sit on top rather than soaking in. Without surface preparation, ink adhesion fails.
What works: An in-line corona treater raises the surface energy of the PE from around 30–32 dynes/cm to 42 dynes/cm or higher — the threshold for water-based ink adhesion. According to industry guidelines, for PE-coated paper, consider a stronger hot-air dryer or UV curing unit to ensure full ink curing, especially in high-speed production. Run the corona treater at every startup; the treatment effect decays within hours, especially in humid conditions.
Native vs. Recycled Board — A Quick Distinction
Native cup stock (virgin fiber) has consistent caliper and surface smoothness. Recycled board contains contaminants and uneven fiber structures, requiring slightly higher impression pressure to push ink into recessed areas. Adjust your anilox selection accordingly — coarser screens for recycled board to deliver more ink volume. Always qualify each batch before a full run.
Impression Settings — The Kiss Principle in Action
Flexography prints with light pressure. The term is “kiss impression” — just enough contact to transfer ink, nothing more. On cup stock, excessive pressure crushes the paperboard fibers and compresses the PE layer, creating halo effects around text and accelerating plate wear.
How to set it: Start with the plate cylinder backed completely off from the impression cylinder. Run the press at low speed. Gradually increase impression pressure until the full image appears. Then stop. That’s your baseline — typically 0.05–0.1mm of compression beyond contact.
| Substrate Type | Recommended Impression | Key Risks |
|---|---|---|
| Virgin cup board (250-350 gsm) | Light kiss | Edge crush if too high |
| Recycled cup stock | Light to medium | Uneven transfer if too low |
| Thin-wall cup board (180-220 gsm) | Minimal kiss | Fluting, wrinkles |
| Thick soup cup board (400+ gsm) | Medium kiss | Fiber crushing |

Managing Anilox Selection for Cup Printing
For paper cup substrates, typical anilox line counts range from 100 to 120 lines per inch for solid coverage, and up to 150 LPI for halftone work. A 120 LPI anilox paired with a 600–800 LPI plate delivers the sweet spot for most cup graphics. Higher line counts produce finer detail but risk ink starvation on rough surfaces.
Drying Adjustments That Actually Work on PE
PE-coated board doesn’t absorb ink — meaning all drying happens via evaporation or curing. With water-based inks, you need heated air flow, not just ambient drying. With UV inks, curing must be complete before the next color or the stack. Reduce line speed temporarily until you confirm the ink is dry before rewind; 50–80 m/min are reasonable starting points for water-based systems on PE. For UV, check lamps at full output and clean reflectors. Hot air direction matters: nozzles should hit the printed web immediately after the plate nip, angled to sweep moisture away. Staged drying (lower temperature at the first station, higher later) prevents “skin-over” where the top dries but solvent remains trapped underneath.
Common Drying Failure Signs
-
Smearing at rewind: Ink transfers to the back of the next layer — increase heat or reduce speed.
-
Ink picking (off at the next station): Incomplete curing between colors — add intermediate drying or slow down.
-
Mottled appearance: Uneven ink film due to poor wetting — check corona levels and ink formulation.
Tension Control — The Hidden Variable
Too much tension stretches the paper web, throws off registration, and causes misaligned colors. Too little and the web wanders, edges wrinkle, or the press stops. On a CI press — where the web wraps around a central impression cylinder — tension stability is critical. PE-coated board reduces friction, allowing the web to slip more easily over rollers. Set unwind tension as low as possible while keeping the web tracking straight. For cup stock of 250–350 gsm, total tension in the range of 50–150 N is typical, depending on web width. Use taper tension at rewind — gradually reducing tension as the roll builds — to prevent core crushing.
Three Setup Mistakes That Cost You Rework
Most waste on cup substrate jobs comes from the same few errors. Avoid these and you avoid most of the headaches.
-
Skipping corona treatment check. Assuming the treater is working without measuring surface energy. Test with dyne pens before each job.
-
Setting tension based on guesswork. Guessing leads to register drift that appears halfway through the roll. Use load cell readouts to store precise targets per substrate.
-
Ignoring paper dust. Uncoated edges of cup board shed dust that accumulates on anilox cells. Install web cleaners upstream and include anilox cleaning in daily maintenance.
Answers to Common Cup Printing Questions
Q: Do I need a special anilox roll for paper cup printing?
A: Not necessarily special, but the right specification matters. For solid coverage on PE-coated board, 100–120 LPI with medium to high cell volume (6–10 BCM) works. For fine detail, 140–160 LPI but verify ink transfer isn’t compromised.
Q: Why does my ink look mottled on the cup after drying?
A: Mottling comes from uneven ink film or poor wetting. Likely causes: corona treatment too low (surface energy under 38 dynes/cm); dirty or worn anilox cells; or ink viscosity too high.
Q: Can I use the same setup for soup cups as for cold cups?
A: Not without adjustments. Soup cup board is heavier (350–450 gsm) with thicker PE coating, requiring more drying energy and higher impression pressure. Cold cups (180–250 gsm) are thinner and more prone to wrinkling.
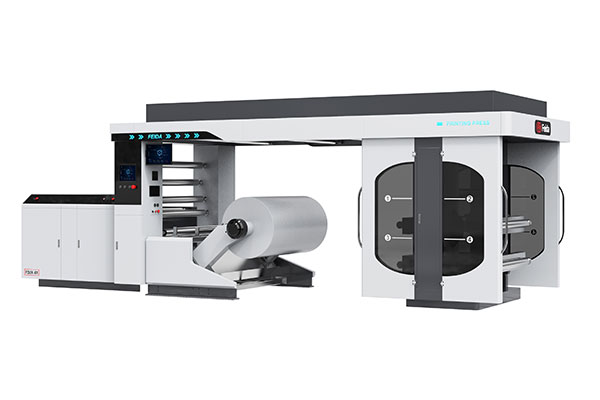
Getting It Right With a CI Flexo Press
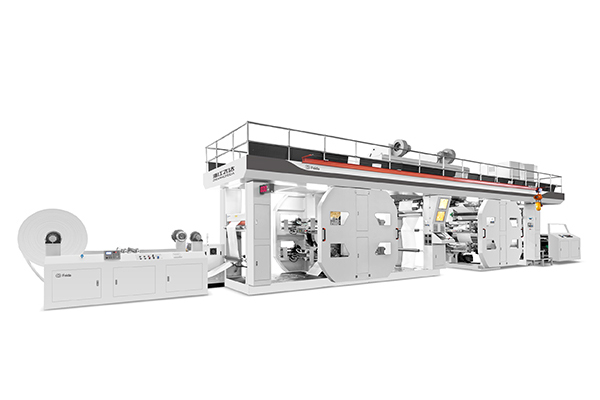
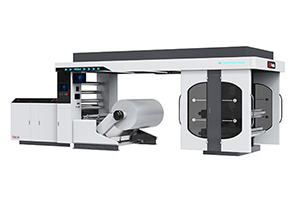
The CI Flexo Printing Machine from Feida is built for paper cup stock demands. The central impression design clamps the substrate firmly against a large-diameter drum, giving a stable web path across all color stations. This minimizes register drift — a common headache on stack-type presses. Feida’s CI press handles web widths up to 1200mm, printing repeats from 500–1200mm, with unwind/rewind diameters up to 1500mm for long, uninterrupted runs. Available with 1 to 10 colors, automated features include servo-driven central drum, closed doctor blade systems, and fully automatic registration control.
Final Checks Before Production
Before committing to a full roll, run a setup check. Print a test pattern across the full web width. Confirm adhesion with a tape test. Verify registration stability across your intended speed range. Document your settings: line speed, anilox specification, impression pressure, tension setpoints, corona power, and drying temperatures. Next time you run the same cup stock, you’ll skip straight to production.
【Request a quote from Feida Machinery for the CI Flexo Printing Machine】 — Share your cup sizes, monthly volume, substrate weight (gsm), and number of colors. Their team will recommend the right configuration for your paper cup printing line.